
All Operators must ALWAYS be wearing gloves and have hair tied back or wearing a hat.
HOW TO SET UP
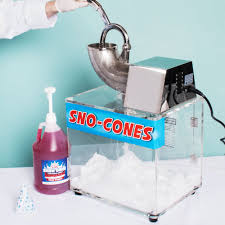
- Place the Snow Cone Machine in position with the door side to the operator. Connect all power to the machine.
- Place the esky filled with ice within easy reach. Place a drip bucket and point the rubber hose into there for melted ice. Place straws at the serving area. Place syrups within easy reach for serving. (do not allow customers to self serve the syrups)
MAKING SNOW CONES
- Lift out ice pusher to rest position, drop ice into shaver followed by pusher arm. To start the machine, keep the Black Button pressed down and Shaved ice will flow into the cabinet. Once you lift your finger off the Black Button, the machine will stop (this is a safety feature). Continue adding ice until you have an attractive mountain of snow, this is important as it attracts customers.
NOTE: Hollow ice is the most suitable ice to use – Do not use hard blocks of ice as this will jam the machine and damage the blades. – a 5kg bag of ice provides approximately 30 serves.
- Using a ladle or scoop, scoop out the shaved ice into a cup.
- Apply the flavoured syrup and serve to customer. Customers can help themselves with the straw.
PACKING UP
- Turn the machine off. Remove any excess ice and water into drip bucket.
- Empty drip bucket, put everything back into the esky.
- Wipe the table down and make sure you do not leave any rubbish behind.
WARNING Do not at any time put hands, fingers, screwdrivers or any objects except ice into shaver head – THIS CAN CAUSE SERIOUS INJURY.